Thursday, May 19, 2011

Sasha's Kitchen: David Chang's Momofuku Fried Chicken with Octo Vinaigrette


I confess, I have not yet been to any of David Chang's Momofuku restaurants (my husband has though!) but I've been dying to get to Momofuku noodle bar and try out the fried chicken and other dishes there.  It's pretty high up on my list of pricy New York restaurants to try, or to fucking try, as Chang would say (he swears quite a bit as noted in this humorous Huffington Post article). Anyhow, I decided to try making Chang's Fried Chicken with Octo Vinaigrette, from the Momofuku cookbook to see how it stacks up next to Thomas Keller's buttermilk fried chicken from Ad Hoc at Home.  I've got to say, this might be my new favorite fried chicken recipe ever. They way I followed the recipe, it is fried, but not as deeply fried, which is just perfect. Plus, the octo vinaigrette that goes on top of Chang's chicken might just be the most delicious chicken dressing ever! The brine here is key with both recipes - it gives the chicken the most moist, succulent flavor ever. This was a winner with my whole family and I plan to make it again next week.


One thing i should note that I did differently. Chang calls for steaming the chicken then deep frying. I really wanted to do this, but my steamer was too small and I would have been cooking the chicken in batches until about midnight the night I made this. So, we would up baking at a low temperature, and then frying the chicken. I was worried it would not be as juicy if I did this, but my husband insisted because he was hungary and low and behold it was still amazing. So read on for the full recipe!


David Chang's Momofuku Fried Chicken with Octo Vinagirette


4 cups lukewarm water
1/2 cup sugar
1/2 cup kosher salt
One 3- to 3 1/2-pound chicken, cut into 4 pieces - (I used a four pound whole chicken cut into eight pieces, but you can also use all wings and legs if you prefer)
4 cups grapeseed or other neutral cooking oilOcto Vinaigrette

David Chang's Octo Vinaigrette
2 tbsp finely chopped garlic
2 tbsp chopped peeled fresh ginger
1 fresh bird's eye-
chili, seeded and chopped
1/4 cup rice wine vinegar
1/4 cup 
usukuchi (light soy sauce) - I substituted light soy sauce
2 tbsp 
grapeseed or other neutral oil
1/4 tsp Asian sesame oil (this makes the dressing what it is!)
1 1/2 tbsp sugar
Fresh ground black pepper


First, brine the chicken. Combine the water, kosher salt and sugar in a large pot with a lid and dissolve the ingredients in the pot. Add the chicken pieces and brine in a refrigerator for at least one and no more than six hours. I found that 4 hours was perfect. 


Set up a steamer on the stove. Drain the chicken and discard the brine. Put the chicken in the steamer basket. Turn the heat to medium and set the lid of the steamer ever so slightly ajar. Steam the chicken for 40 minutes, then remove it from the steamer and put it on a cooling rack to cool. Chill it in the refrigerator, preferably on the rack, for at least 2 hours or overnight. I must add that I instead baked the chicken at 300 degrees instead of steaming, and it worked out just fine, so don't be afraid to do this if you need to. 

Take the chicken out of the refrigerator and allow to set for thirty minutes before frying.In a deep skillet, heat enough oil for the chicken to be submerged to 375 degrees. Fry the chicken in batches, turning once, until the skin is deep drown and crisp, 6 to 8 minutes. Remove to a paper towel-lined plate to drain the excess oil. I fried the chicken in grapeseed oil, as recommended, which was lovely!


Combine the ingredients for the Octo Vinaigrette in a bowl. Make sure the garlic and ginger are chopped or pureed finely (I bought them pre-chopped).  Top the chicken with this delicious vinaigrette and enjoy!


Share/Save/Bookmark

Wednesday, May 18, 2011

Sasha's Kitchen: Spectacular White Pizza Variations


I've long prided myself on my pizzas, but lately my pizza making has really taken it up a notch. I have a crust that is absolutely to die for and have perfected my technique with shaping the pizza crusts to get them just the way I love my pizza. Lately, I've tried a couple different variations on white pizza, both of which I will share here. I used a combination of lowfat mozzarella, monterey jack and cheddar shredded cheese which are my favorite for white pizzas (I personally don't care for ricotta on my pizza, and neither does Brad, my husband). These variations include the use of ShopRite's new basting oil, which is filled with a delicious blend of herbs, a great new product that I received for free to review. Initially i was skeptical about using this on pizza, rather than to, say, baste a turkey. But it was spectacular. I mixed it in with the shredded cheeses and it added a lovely blend of herbs to the pizza, kind of like a garlic bread feel. So, I tried that on one of the pizzas below. Also, I found that pimentos are not just for southern cheese, they are absolutely perfect on a white pizza!


Sasha's Pizza Dough
1 cup warm water
2 packages dry active yeast
1 1/2 tsp sugar
2 T extra virgin olive oil
3 cups all-purpose flour
1 tsp salt

Sasha's White Pizza Variation One
two red onions, sliced into rings
organic turkey bacon from Applegate Farms (best turkey bacon ever!), cooked before adding to pizza
Fresh/dried Oregano and Basil to season
1 package shredded part skim milk mozzarella cheese
1 package shredded cheddar/Monterey Jack mix

Sasha's White Pizza Variation Two
two red onions, sliced into rings
3 T ShopRite basting oil
pimento peppers

1 package shredded part skim milk mozzarella cheese
1 package shredded cheddar/Monterey Jack mix

To prepare the dough, combine the warm water, dry active yeast and sugar in a bowl.  Allow to sit for about ten minutes until the yeast mixture is bubbly and frothy.  This indicates that the yeast has activated.  Combine in bowl, or in your stand mixer (I used my mixer for this) with the olive oil, flour and salt, until it forms a dough.  Place in an oiled bowl (sprayed with PAM, for example) and cover with a damp cloth.  Allow to rise in a warm place for one hour. I used to let it go longer, but I found that one hour makes a better crust that is not over-puffy.

Cook the bacon, or prepare the other toppings depending on which variation you are making. If you do the second variation, mix in the basing oil with the cheeses.

Stretch the pizza dough onto a pizza stone which is lightly coated with cornstarch. Top with the cheeses or cheeses with basing oil mixed in and add the other ingredients to top.

Bake at 400 degrees for about 30 minutes. If there's any excess oil, you can get rid of it using a paper towel.


Share/Save/Bookmark

Sunday, May 15, 2011

Sasha's Kitchen: Ad Hoc's Mushroom Soup


I haven't made a recipe from Ad Hoc at Home in awhile, but it is a great Keller cookbook, so I decided to give another one of his soups a try. I wasn't exactly sure how I felt about mushroom stoup, but this soup, made with a homemade mushroom stock, was an absolutely wonderful vegetarian soup, and a nice, healthy soup. Surprisingly, making mushroom stock is actually quite easy and far less time-intensive than making a homemade chicken stock. The soup itself calls for Hen of the Woods mushrooms. There are no other mushrooms quite like these - they are extremely flavorful, funny looking and fantastic. I've cooked with them before when I got them at Wegmans, but this time I couldn't get my hands on them in time. It's Ok though, because just as Keller suggests in the book, oyster mushrooms are a perfectly reasonable substitute.


Thomas's Keller's Mushroom stock from Ad Hoc at Home (this is 1/2 of the original recipe)
2 lbs button mushrooms
1 medium onion, coarsely chopped
1 large carrot, chopped
greens from one leek, chopped
3 quarts of cold water
1/4 head of garlic, crushed, skin left on
1/4 bunch flat parsley
1/4 bunch thyme
2 bay leaves
1/2 T black peppercorns

Keller suggests pureeing some of the vegetables  (specifically the mushrooms), but I decided not to do that, and just left them as is in the soup. It worked out fine and the broth had a fantastic mushroom flavor that soaked it up from the mushrooms. Put all of the vegetables in a stockpot and add the water, then bringing to a boil. Add the garlic, herbs, bay leaves and peppercorns and put the pot on simmer. Simmer uncovered for 45 minutes. Then, strain the soup, keeping only the stock. Keller suggests doing this using an ice bath, but you don't really need that either. Measure the stock. If you have more than two quarts, reduce it in a saucepan, simmering. The mushroom soup recipe on page 119 of Ad Hoc at home (see below) requires eight cups (two quarts) of the mushrooms stock, which is why I cut the recipe in half.


Thomas Keller's Mushroom Soup from Ad Hoc at Home
Canola oil
1 cup diced carrots
1 cup diced leeks
1 cup diced onion
kosher salt
1 1.2 tsp minced garlic
1 small bunch of tuscan kale (cavolo nero)
1 1/4 pounds (2 or 3 large) yukon gold potatoes
1 sachet (1 bay leaf, three sprigs of thyme, 10 black peppercorns and 1 clove garlic)
2/3 lb hen of the woods or oyster mushrooms
1 1/2 T butter
1/4 cups minced shallots
1 T fresh thyme
8 cups homemade mushroom stock
freshly ground black pepper
5 to 6 T garlic puree (I used five)
1 to 2 T red wine vinegar (I used one)
extra virgin olive oil

Heat three T of the canola oil in a large stockpot over medium heat. Add the carrots, leeks, onions and a pinch of salt. Cover with parchment paper and cook slowly for about 25 minutes. The vegetables will have released their liquid, Keller says, but will not yet be tender.  Take off the parchment lid and add the garlic. Cook for another ten minutes until the carrots are tender. Remove the ribs from the kale and set aside for later.

Peel the potatoes and slice crosswise into large pieces, then quarter. Put the potatoes, herb sachet (which you can make using cheesecloth) and 2 tsp of salt in a saucepan. Simmer and cook until potatoes are tender, which took me about 15 minutes. Drain and allow to cool.


If using hen of the woods mushrooms, break them apart. If you are using oyster mushrooms, you will not need to do this. Heat some canola oil and add half of the mushrooms, seasoning with salt and cooking for about a minute to let the mushrooms absorb the oil. Add half of the butter, shallots and thyme and saute until mushrooms are browned, 6 to 8 minutes. Then repeat with the other half of the mushrooms.

Add the mushroom stock to the stockpot with the carrots and other vegetables and bring to a simmer. Season with salt and pepper as needed. Blanch the kale in a large pot of salted water until just wilted and tender. Add the mushrooms, kale and potatoes to the pot, and add the vinegar at the end. Serve hot.
Share/Save/Bookmark

Friday, May 13, 2011

Sasha's Kitchen: Boston Cream Pie Cupcakes


I've been on a bit of a kick recently making pies (with the start of pie season), which had led me to try and create some pie themed cupcakes. Recently, I baked an apple pie and a strawberry rhubarb pie, followed by some fabulous key lime pie cupcakes, complete with a graham cracker crust. The key lime pie cupcakes were just like a bite of the real thing, packed into a cute cupcake. So I decided that I could also recreate a Boston Cream Pie in cupcake form. These were just as good too! There are four components - a shortbread crust, a vanilla cupcake, a basic pastry cream filling and a fabulous light whipped chocolate frosting. Its really hard to say, but these are pretty high up there on my list of cupcakes I've made in terms of taste. Another trick - when most people fill cupcakes, they cut off the top, add the filling and reattach the top. Yet, this often makes the cupcake a bit messier to eat. Instead, I used a fairly thin fitted pastry tip and poked it into the top of the cupcake and "injected" the pastry cream into the cupcake. This works just fun and as you can see from the cross section photo, distributed the filling well inside the cupcake.


Sasha's Boston Cream Pie Cupcakes

Crust:
3/4 cup pulverized shortbread cookies
2 T sugar
3 T melted butter

Vanilla Cupcakes:
1 1/2 cups flour
1 tsp baking powder
3/4 cup sugar
1/8 tsp salt
1 stick of butter
3 eggs
1 1/2 tsp vanilla
1 cup of  milk

Pastry Cream Filling:
1 1/2 cups heavy cream
4 egg yolks
1/3 cups sugar
pinch salt
4 tsp cornstarch

Chocolate Fudge Frosting: (adopted from this recipe as inspiration only to do it with melted chocolate rather than cocoa powder)
6 T butter
4 cups confectioner's sugar
1/3 cup to 1/2 cup milk
3 oz melted semisweet chocolate

First make the crusts. Melt the butter and combine with the sugar and pulverized shortbread cookies. Line paper liners for cupcakes with about a teaspoon and press to form a crust. Bake at 350 for about 15 minutes until it sets only.


To make the cupcake batter, combine the dry ingredients in a bowl. Beat the butter and sugar in a mixer until fairly smooth, for about two minutes. Beat in the eggs and vanilla. Then alternate beating in the milk and the dry ingredients until smooth and well combined. Fill the cupcakes 3/4 of the way to the top, and bake at 350 for about 30 minutes (the time depends on your oven) until a toothpick comes out clean, but take out before you see any browning action on the cupcake tops, as you don't want to burn them.

Allow the cupcakes to cool while preparing the pastry cream filling. Warm the heavy cream in a sauce pan. Combine the sugar, egg yolks, salt and cornstarch in a separate bowl. Combine over heat until it thickens into a custard, and stir in the vanilla towards the end. Chill for about 30 minutes before using.

Using a fairly thin tip (but not a micro thin tip) pastry tip attached to a pastry bag, pierce the top of each cupcake and squeeze the filling into the center of the cupcakes, using my "injection" technique. Don't worry if some oozes out the top as you will be covering that with frosting.

Now, the best part of these cupcakes is the frosting. I have made rich chocolate frostings with cocoa powder in the past, which are great, but a bit too intense for my taste. This is just the perfect, light chocolate whipped frosting! Beat the butter with the confectioner's sugar for several minutes on high speed in your mixer. Add 3 oz of the melted chocolate and the milk and beat until a nice frosting forms. Add the milk 1/4 cup at a time until the frosting reaches your desired consistency. I added between 1/3 and 1/2 of a cup of skim milk. Frost the cupcakes using a frosting bag with a fluted tip and devour immediately!


Share/Save/Bookmark

Wednesday, May 11, 2011

Sasha's Kitchen: Hawaiian Style Ahi Poke


Ahi Poke was one of my favorite dishes from the time I spend in Hawaii several years ago on our honeymoon. I've occasionally gotten it outside of Hawaii since but it's never really the same as it was in Maui but if the ahi tuna quality is good, it can still be delicious. This is my husband's favorite Hawaiian dish, and although I have made plenty of sushi, I've never given Ahi Poke a try. But, I came across this recipe in one of my favorite Jamie Oliver books. The result was fresh and delicious since I used high quality sushi grade bluefin tuna. Not quite the same as locally caught Hawaiian ahi during my honeymoon, but still healthy and delicious. The tuna for this recipe is basically raw, but it does cook slightly (or at least change chemically) due to the lime juice in the recipe. Now that I know how delicious this recipe was, I plan to try some Hawaiian poke recipes in the future until I can get back to the lovely 51st state.


Jamie Oliver's Asian Infused Tuna (Ahi Poke) (adapted from the original recipe in The Naked Chef Takes Off)
1 lb tuna (bluefin if possible) - sushi grade
1 ripe avocado, peeled and diced
juice of 4 limes, to taste
1/2 diced jalapeno (Jamie uses a bit more)
3 T sesame oil
4 T coconut milk
handfull of fresh cilantro, finely chopped
2 T sesame seeds
pinch of freshly chopped ginger
soy sauce to taste (I added about 1/2 tsp)


Finely dice the tuna and mix with the res of the ingredients. You should serve immediately, on either toasted french bread (like Jamie suggests) or on crackers, which is how I served it.
Share/Save/Bookmark

Monday, May 9, 2011

Sasha's Kitchen: Rib Eye Cheesesteaks


I know I have written about cheesesteak before, but I could not help myself. I made this a couple of weeks ago and it was just too good not to share on A Kitchen In Brooklyn. Sure, I love the Philly style cheesesteak with thinly slice steak, onions and liquid cheese, but this at home "dressed up" style cheese steak made with rib eye is pretty good as well. There's plenty of ways to make a great cheesesteak or steak sandwich, but this one incorporates my preferences - grass fed rib eye, caramelized onions, provolone cheese and roasted red pepper, on a delicious long sandwich roll. My love for this sandwich comes from my college days at Haverford College and some great steaks at Genos and Pats.


Sasha's Rib Eye Cheesesteak

3/4 lb rib eye, thinly sliced
two onions, sliced
2 T of sugar
canola oil  or olive oil
2 long Italian rolls or hoagie rolls
1 roasted red pepper, sliced
provolone cheese (1/4 lb)

To prepare the meat, we chose to season and cook the steak on a grill pan, about medium. A the end of the grilling process, my husband sliced the rib eye thinly using an electric meat knife. It is worth noting that I used grass fed rib eye for this recipe, which is the healthiest type of red meat to be eating if, like me, you care about your body and your planet. You could also slice the meat before cooking if you prefer and it might cook much faster. But I found my method to work just fine.

Then I prepared the onions by sautéing them with the sugar and canola oil to caramelize the onions. I prepared the sandwiches with the hoagie rolls, onions, roasted red pepper slices and cheese and put both sandwiches in the oven to toast until the cheese was fully melted.  The result was mouthwateringly good! I like mine plain, but feel free to douse with hot sauce or steak sauce if you prefer.


Share/Save/Bookmark

Saturday, May 7, 2011

Sasha's Kitchen: Vanilla Panna Cotta with Strawberries


Ah strawberries - my absolute favorite thing about spring. As a kid, there was nothing I loved more about spring than strawberry picking with my mom.  Right now, I have plans for two types of strawberry souffles (frozen and regular), and plenty of other uses for these fabulous sweet spring berries. This time of year, just about everything goes better with strawberries. Click here for my strawberry rhubarb pie. Panna cotta is an easy dessert that is wonderful with a multitude of berries. I decided to make some plain vanilla panna cottas and serve them with local fresh strawberries, and the dessert was perfect. Some might prefer to soak the strawberries, say in sugar or amaretto, but I prefer to just use the natural essence of the berries and keep the sugar down a bit, thus I simply sliced them up and served them with the panna cotta.


Sasha's Vanilla Panna Cotta with Strawberries (makes 4)
1 pint of fresh, local strawberries
2 tsp vanilla extract
2 small packets of instant gelatin
2 cups of organic heavy cream
1/4 cup granulated sugar
pinch of kosher salt
1/4 cup hot water
1/4 cup cold water

Combine the cream, sugar and vanilla in a saucepan. Simmer ver low heat for about five minutes to dissolve the sugar. Set aside to cool for a few minutes. In a separate bowl, mix the gelatin and the cold water. Then add the hot water until all of the granules of gelatin are dissolved. Mix the gelatin-water mixture into the cream, and divide among four ramekins. Refrigerate for about eight hours.

To serve, cut around the edge of the ramekin with a knife and carefully remove from a ramekin. This takes a bit of extra work to get it out without destroying it in the process. Serve with fresh, local strawberries.
Share/Save/Bookmark

From Amasea's Kitchen in Sun Valley: An early experiment with a deep fryer


So last week we bought a deep fryer.

I'd been wanting one for quite a while -- it was even on our wedding registry, but we didn't receive one -- and so I decided to use a gift certificate to buy (it helped that it was on sale). I felt very modern looking up its Amazon reviews on my iPhone right there in the store (don't judge me, I've only had the smartphone since March, and am only just starting to appreciate its useful functions aside from tracking me at all times, which I've actually found to be quite useful in monitoring my new workout regimen).

So we bought a 1.1 liter Cuisinart deep fryer, which seemed like a good size for two of us. Last Saturday night I deep fried everything in the house that seemed appropriate, and a few things that didn't (Triscuits = NOT good deep fried). It's hard to stop once you start.

Some things turned out excellent, including the spicy pickles I canned last year that I am seriously looking forward to tempura battering and cooking in the awesomeness that is hot oil. I might even get some of those delicious refrigerated grocery dills, just so I can eat them deep fried. With whole-grain mustard. I would be tempted to say OMG if it weren't so teenage girl.

But tonight, I used Nasoya wonton and spring roll wrappers I bought this week with great aspirations. Tonight, I got pineapple, mushrooms, cabbage, carrots, ginger and bean sprouts, and added some ground pork, garlic and about half a dozen different underused Asian sauces, in various combinations. The pork, mushrooms, ginger and garlic (with soy sauce and Mongolian Fire oil) I sauteed in one pan, and the julienned carrots and cabbage with sesame seeds and sesame oil in another, so I could play with proportions.
I tried both wontons and spring rolls and only after about two batches realized I hadn't turned up the deep fryer to the right temperature. *sigh*
But the ones at the right temperature turned out AWESOME. Seriously, they were equally as good as anything I've had at a restaurant, and I'm not one to equal my skills to any professional chef's. Y'all need to try this.
Oh, I nearly forgot to mention -- the wrappers hold up best if you very lightly moisten them before adding filling; just a finger dipped in water and rubbed across the interior surface of the wrapper significantly increases their ability to hold up during wrapping and frying. And if you don't end up with holes in the wrapper, a lot less oil gets into your filling, which makes them easier to drain and not taste "oily."

The various fried bits, dipped in Thai Kitchen Sweet Red Chili Sauce (thank you, Costco!), totally filled us up, but I wasn't quite done yet. So I julienned a fresh strawberry and added a little bit of goat cheese and balsamic reduction, wrapped all that up in a wonton and did one final fry. I think it would have been significantly better with cream cheese, as the goat cheese was too grainy, but still, a perfect end to my first truly successful deep frying experience.

Anyone have any excellent deep frying experiences/recipes they want to share? I'm eager to do some fish & chips, panko-breaded stuff, etc!
Share/Save/Bookmark

Friday, May 6, 2011

Sasha's Kitchen: Grilled Lamb Kebabs with Mango Chutney


Kebabs - perfect for the start of summer grilling season. I made these indoors on a grilling pan rather than on a regular grill, but it still worked out beautifully. I decided to make lamb kebabs this time, though of course there's a million and one ways to make kebabs. This time I decided to do pretty traditional kebabs, and used good quality lamb from Fresh Direct, which I prepared using a somewhat Indian styled yogurt based marinade. I served the kebabs with two kinds of chuntey - cilantro mint chutney and my favorite mango chutney recipe that I have been making since I was a kid. The mango chutney was fabulous with this dish, and hence I decided to share that recipe. Happy Grilling!


Sasha's Lamb Kebabs
2 cups of lowfat Greek yogurt
2 tsp coriander
2 tsp cumin
1/4  tsp cayenne pepper
1/2 tsp cardamom
1 to 1/2 lbs of lamb, cut up into chunks for kebabs


Mango Chutney (recipe loosely derived from this cookbook)
4 francine mangos (you can use 2 regular mangos if you prefer), skinned and cut into small pieces
2 gala apples, peeled and diced
3/4 cup onion, diced
1/2 cup brown sugar
1/2 jalapeno pepper, seeded and minced (you can use a whole pepper if you prefer to add more heat)
1 T minced fresh ginger
3 cloves of minced garlic
1/2 tsp cumin
1/4 tsp cloves
pinch of Kosher salt
pinch of cayenne pepper


Mix the ingredients for the marinade with the yogurt.  Mix with the lamb and allow to chill for about an hour.

To make the chutney, combine all of the ingredients in a large saucepan and cook over low heat, stirring occasionally. Simmer for about 25 minutes until the mixture has a jam-like quality. Allow the chutney to cool before serving.
All ready for the grill!

Using kebab skewers (I used wooden ones, but you could also use metal), prepare the kebabs by alternating the meat with onions and cherry tomatoes and grill away, rotating as you grill so everything cooks evenly.
Share/Save/Bookmark

Tuesday, May 3, 2011

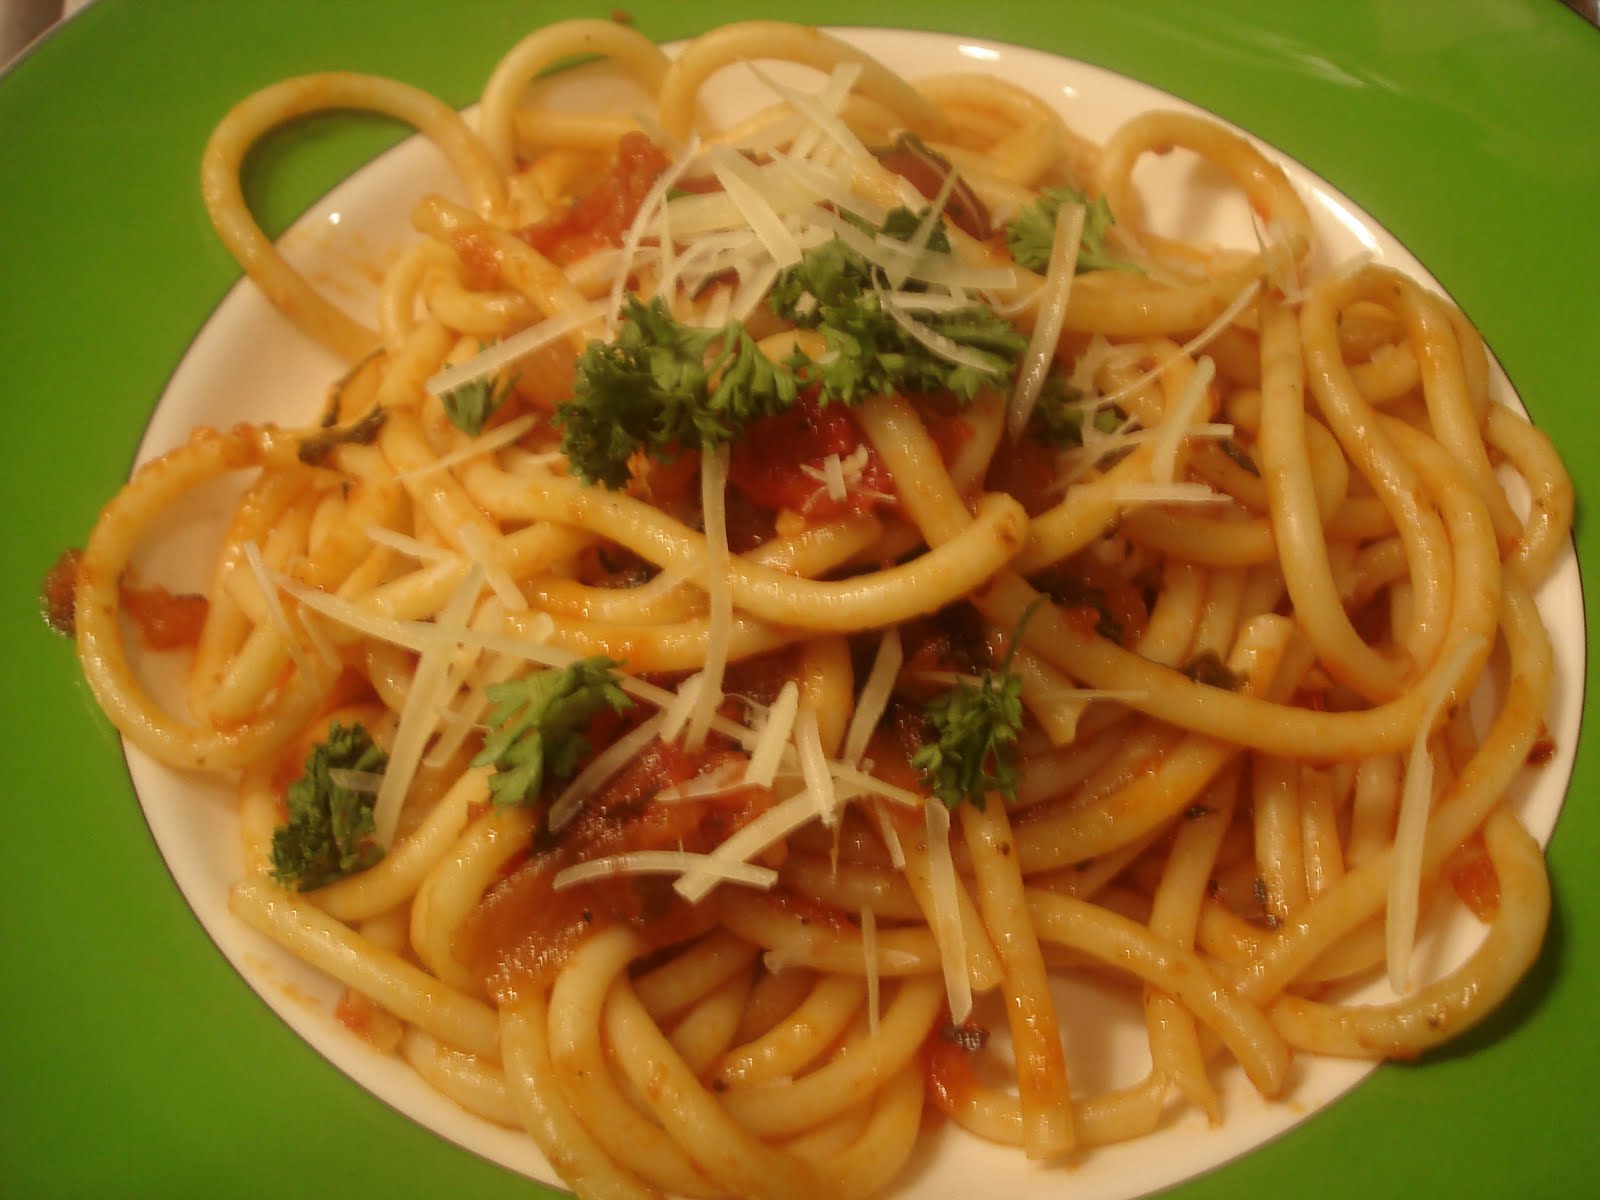
Sasha's Kitchen: Bucatini All'Amatriciana


Lupa is one of my favorite restaurants in New York. Babbo's twin sister, it has a more relaxed atmosphere and more reasonable prices, but its still classic Mario Batali.  My favorite thing to get when I go to Lupa (though they have the same dish at Babbo) is Mario's classic pasta dish bucatini all'amatriciana. I was able to score some bucatini, or hollow tubular pasta at Eataly a couple weeks ago, in preparation to make this dish using Mario's original recipe.  You really do need to use actual bucatini pasta to make this dish properly. Yes, you can use spaghetti, but it really takes away from the dish having the proper texture and feel, and maybe even taste. This time I did everything to the letter and I was thrilled with the results of this textbook bucatini all'amatriciana. Yes, I usually do not eat pig-derived products as a rule, but this is the one dish I make an exception for!

Mario Batali's Bucatini All'Amatriciana (adapted from this recipe)
3/4 pound guanciale
3 garlic cloves
1 red onion, halved and sliced 1/2 inch thick
1 1/2 tsp hot red pepper flakes (I used closer to only 1 tsp)
kosher salt and freshly ground black pepper to taste
2 cups basic tomato sauce (see below; note I used more than Mario because I like a saucy pasta)
1 lb bucatini
1 bunch fresh leaf parsley
pecorino romano or parmesan for grating

Mario's basic tomato sauce
1/4 cup extra virgin olive oil
1 spanish onion, chopped in a quarter inch dice
4 cloves of garlic, peeled and chopped
3 T chopped fresh thyme
1/2 medium carrot, finely shredded
2 cans peeled whole tomatoes, crushed by hand, juices reserved
salt to taste


Heat the olive oil in a large saucepan. Add the garlic and onion and cook until golden brown. Add the thyme and carrot and cook five minutes more until the carrot has softened, before adding the tomato and juices. Bring to a boil, then simmer for about 30 minutes. Season with salt and serve. This makes 4 cups and technically you are only supposed to use two cups, but I used all of it and the dish was saucy and amazing.

Next, bring a large pot of about six quarts of water to boil with two teaspoons salt.  In a saute pan, cook the guanciale slices over medium heat until most of the fat has been rendered from the meat, rotating occasionally.  Remove the meat, and use the remaining fat to cook the onions, garlic and red pepper flakes. According to Mario you are supposed to discard some of the fat if you have too much but I didn't so I kept it all. Return the guanciale to the pan and cook for another five minutes until the onions look golden brown in color. Season with salt and pepper and add in the tomato sauce.

Cook the bucatini in the boiling water until al dente. Drain the pasta and add to the simmering sauce, while adding the parsley at the end. Then, turn to high heat, and toss to coat. Serve immediately with grated cheese.


Share/Save/Bookmark
Related Posts with Thumbnails Share