Showing posts with label pasta. Show all posts

Saturday, April 14, 2012

Sasha's Kitchen: Bucatini with Cauliflower and Ramps


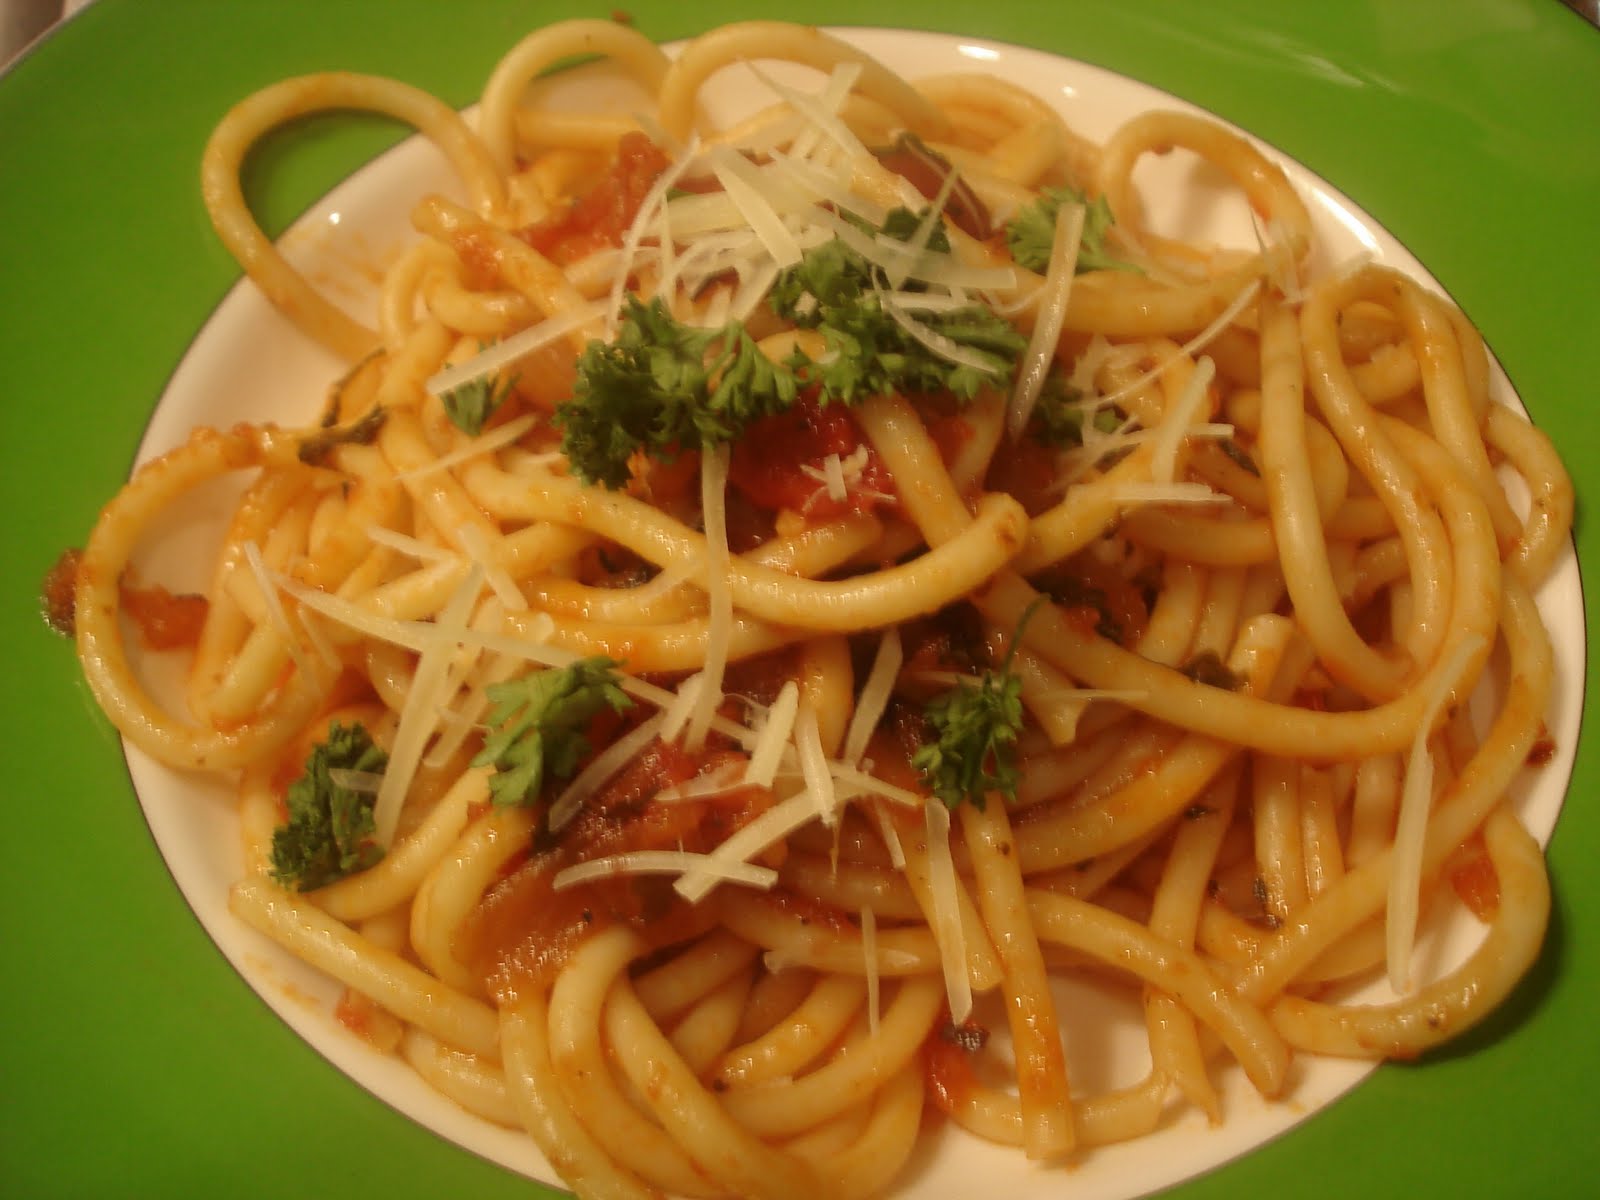
I'm really into making pasta dishes with spring vegetables right now.  I love using everyuthing that's seasonal.  I'm happy to say that I scored the first rhubarb of the season at Union Market in Park Slope and am making a rhubarb crumble pie this weekend (posting it soon!).  In the meantime, I've been enjoying making some vegetable pastas.  Ramps finally arrived at FreshDirect just before Passover so I made this delicious dish just before passover started.  Ramps, if you are not familiar with them, are wild onions, usually gathered by hand.  They are a bit of a cross between leeks and wild garlic.  I like using them in pasta dishes during their short season.  Some people also like to make pickled ramps, but I haven't tried that yet.  Next week, I'll be making swiss chard ravioli dough with ramps/ricotta/marscarpone cheese and a rose vodka sauce.  Here's the first garden fresh pasta of the spring.

Sasha's Bucatini with Cauliflower and Ramps
1 lb bucatini pasta
florets from one cauliflower head, diced into small pieces
1 bunch of ramps, diced
zest of half a lemon
extra virgin olive oil
1 pint halved yellow grape tomatoes
1/3 cup panko bread crumbs

To make this dish, first saute the cauliflower in a couple tablespoons of extra virgin olive oil, for about ten minutes, until soft.  Add the lemon zest and the ramp bulbs (separated from the green part of the ramps) and cook antoher two minutes.  Then add the diced green part of the ramps and the yellow tomatoes and saute another few minutes until the tomatoes are softened and shriveled.  In the meantime, cook the bucatini (hollow tubular pasta) according to the package instructions.  Toss the panko bread crumbs in with the vegables and mix in the pasta.  You can add a bit more olive oil if needed, and be sure to reserve a bit of the pasta water and add that in as well. This was delicious!
Share/Save/Bookmark

Saturday, March 24, 2012

Sasha's Kitchen: Rigatoni with Broccoli and Turkey Sausage


Sorry for the lack of posts the last couple of weeks.  Life has been getting in the way of both cooking and writing, but I do have a backlog of some delicious meals and desserts to share.  I hope to be getting back into the swing of things a bit more.  I've made some good pasta dishes recently.  I'm looking forward to ramps coming back into season so I can make my ramp ricotta ravioli, but this Martha Stewart/Emeril dish I tried out with broccoli came out so good I made it twice.  I was tempted to leave out the anchovies/anchovy paste, but the recipe warned against doing that so I left it in, and it was the secret ingredient that made the dish delicious.

Rigatoni with Broccoli and Sausage (from Everyday Food)
coarse Kosher salt and ground pepper
1 lb rigatoni
2 head broccoli cut into florets (about four cups)
1/4 cup extra virgin olive oil
2 cloves garlic, minced
1 T grated lemon zest
2 T lemon juice
4 anchovy filets, minced into a paste (I used 1 tsp anchovy paste)
1 lb sweet italian turkey sausage, casings removed
parmesan, grated for serving

In a large pot of salted boiling water, cook the pasta according to package instructions (about ten minutes, total).  In the last 2-3 minutes of cooking add the broccoli and cook until bright green and crisp-tender.  Reserve one cup of the pasta water and grain pasta and broccoli.

In a small bowl, whisk together the zest, lemon juice, oil, garlic, anchovy paste, 1/2 tsp salt and 1/4 tsp pepper.  Add the sausage to pot and cook over medium high, breaking up meat, until browned and cooked though - about eight to ten minutes.  Return pasta and broccoli to the pot and add the oil mixture and toss to combine, adding enough pasta water to create a thin sauce that coats the pasta (I used about half a cup of the pasta water).  Serve with parmesan cheese.


Share/Save/Bookmark

Thursday, February 2, 2012

Sasha's Kitchen: Pasta Tomato Medley


I made this lovely pasta dish last week.  It was was excellent, but I kept thinking that it is really a dish for the summer.  As good as it was with fresh tomatoes that I was able to secure in the dark of winter, it would have been amazing with summer yellow tomatoes, or with fresh heirloom tomatoes.  Still, it was a satisfying pasta dish that made enough for two nights easily.  I've been under a bit of stress lately with things going on in my life, so this was just the meal we needed - nice and easy, but still filling, healthy and delicious with lots of leftovers.  This dish was inspired by and very loosely adapted from a recipe that I found for tomato-angel hair pasta in Marcus Samuelsson's cookbook, New American Table

Pasta Tomato Medley 
1 pint yellow cherry tomatoes, halved
3 on the vine red tomatoes, diced
1/2 tsp sea salt
3 cloves garlic, diced
3 shallots, diced
1 14 oz can crushed tomatoes
1/2 cup arugula, chopped
1/2 tsp black   pepper
2 tsp chopped fresh oregano
1/2 tsp red pepper flakes
1 red bell pepper, chopped
grated parmesan cheese


Place the fresh tomatoes in a large bowl with the sea salt and allow to sit for 45 minutes.  Bring a pot of salted water to boil and cook the pasta until al dente, rinse and set aside.  To make the sauce, heat 3 tablespoons of olive oil in a large pot over medium heat and add the garlic, red bell pepper and shallots and cook until softened, three to four minutes.  Add the crushed tomatoes and bring to a simmer.  Cook for five minutes.  Toss the pasta, the salted tomatoes, arugula, pepper, oregano and red pepper flakes in the saute pan and heat until warmed through.  Season with salt and pepper and serve with parmesan sprinkled on top.
Share/Save/Bookmark

Monday, November 7, 2011

Sasha's Kitchen: Butternut Squash Ravioli with Sage Brown Butter Sauce


I love making ravioli en masse using my ravioli press and pasta maker.  Yes, it's a bit time consuming, but it really doesn't take so long and you get several quick meals out of it in the end as your reward.  So, it's a great activity for a Sunday morning after yoga class.  Being that its fall, I figured it was time for butternut squash ravioli and what's a better way to serve it than a sage brown butter sauce. This meal was a huge success and there's plenty left in the freezer to enjoy for future dinners in a pinch.

Sasha's Butternut Squash Ravioli filling
32 oz cubed butternut squash, roasted and pureed
1/2 tsp cinnamon
1/2 tsp nutmeg
1 tsp brown sugar
1/2 cup grated parmesan cheese

Sasha's Pasta Dough
5 eggs
3 1/2 cups all purpose flour
2 T cold water
1 tsp kosher salt

Sasha's Sage Brown Butter Sauce
6 T butter
12 sage leaves
2 tsp lemon juice

Roast the squash at 400 until soft.  Puree in a blender.  Mix with the other ingredients for the filling and set aside.  To make the dough, I used my mixer.  Combine the eggs and flour on medium speed and pulse until mixed.  Add 2 T of water until a dough forms.  You may need to use your hands to bring it into four balls of dough.  Wrap the balls of dough in plastic wrap and refrigerate for one hour.


Roll out sheets of dough to setting seven on your pasta maker and press using the ravioli press, adding the filling.  Allow to dry for an hour on a drying rack.  Then place the drying rack in your freezer and freeze for an hour before placing in bags.

To prepare the sauce, melt the butter until brown.  Add the sage leaves and cook another minute, before stirring in the lemon juice.  Cook the pasta for five minutes or so in boiling salted water and toss in the butter sauce and serve hot.

In the mood for most pasta? Check out my baked ziti on ShopRite's food blog, Potluck - my newest ShopRite post using their organic pasta.
Share/Save/Bookmark

Sunday, October 2, 2011

Sasha's Kitchen: Baked Ziti with Turkey Meatballs


I love baked ziti. Not the healthiest thing out there, but all that sauce, pasta and cheese - what's not to love? It takes a bit of time to put everything together, but its a great comfort meal that usually produces galores of leftovers.  I had recently received some great organic pastas to try from ShopRite for free as a ShopRite Potluck blogger, so I decided to use the one pound bag of delicious penne to make this baked ziti. The result was delicious and the pasta was just perfect for this recipe.  The turkey meatballs are a wonderful addition that lend flavor to this dish. 


Baked Ziti with Turkey Meatballs (adapted from this recipe from Epicurious)

  • 1 pound ground turkey
  • 1 large garlic clove, minced
  • 3/4 cup fresh bread crumbs
  • 1/2 cup finely chopped onion
  • 3 tablespoons pine nuts, toasted, cooled, and chopped
  • 1/2 cup minced fresh parsley leaves (preferably flat-leafed)
  • 1 large egg, beaten lightly
  • 1 teaspoon salt
  • 1 teaspoon black pepper
  • 4 tablespoons olive oil
  • 1 lb ziti or penne
  • 1 1/2 cups grated mozzarella cheese (about six oz)
1 cup grated romano cheese
about six cups of tomato sauce (store bought, or make your own, like I did)
15 oz ricotta cheese


In a bowl, combine the pecorino/romano and mozzarella and set aside.  In a pot of salted water, make the pasta, al dente.  To make the meatballs, mix the ground turkey with the garlic, bread crumbs, onion, pine nuts, parsley and egg until combined with your hands and form 1 inch meatballs.  Instead of cooking them in oil, I baked them for about 40 minutes at 350 until cooked through.


Preheat the oven to 350 and spray a 3-4 quart gratin or lasagna dish.  Then, spoon about 1 1/2 cups tomato sauce and half of meatballs into prepared dish and spoon half of pasta on top. Spread half remaining sauce and half cheese mixture over pasta. Top with remaining meatballs and drop dollops of ricotta over meatballs. Spread remaining pasta over ricotta and top with remaining sauce and remaining cheese mixture. Bake the ziti for about 30 minutes until golden and serve hot. 


Share/Save/Bookmark

Thursday, September 1, 2011

Sasha's Kitchen: Pasta with Pesto, Feta and Grape Tomatoes


Time for another delicious pasta dish. And some like it hot, some like it cold. This one is good either way. The first time I made this last week, I used store bought bow tie pasta and it was a big hit here at home.  Then, earlier this week, I received a shipment of organic Italian pastas from ShopRite to sample, all from the Lombardy region of Italy. So I tried it out with a one pound bag of ShopRite's radiatore pasta, and it was superb.  The ShopRite pastas are excellent, and it had a lovely, perfect al dente texture. I am such a fan of the radiatore that I can't wait to try out some of the other pastas that ShopRite sent me to sample (free of charge, of course :).

At any rate, this dish combines the pasta with flavors of red onion, pesto, feta cheese and broiled grape tomatoes. It's a delicious combination of flavors, and as I said before, can be served either hot or cold. A Sasha-pasta creation at its finest!

delicious Organic Italian pastas I received to sample from ShopRite


Sasha's Pasta with Pesto, Feta and Grape Tomatoes (serves 6)
1 lb ShopRite radiatore pasta, or bow tie pasta
2 containers grape tomatoes, halved
2 cloves garlic, diced
2 8 oz packages of feta cheese
1 red onion, diced
leaves of 1 bunch of basil
1/4 cup pine nuts
2/3 cup extra virgin olive oil


Prepare the pesto in a food processor by blending the basil leaves with the olive oil and pine nuts (also known as pignolia nuts - I love that word!). Set aside. Broil the tomatoes for about 20 minutes at 450. Saute the red onion in olive oil for several minutes, then add the garlic, and saute until the onion is translucent. Cook the pasta in salted boiling water until al dente, and rinse. Combine the pesto, onion/garlic, pasta and crumbled feta cheese. Serve hot or allow to chill. Another great thing about this dish is that it results in plenty of leftovers for the next night, which makes it perfect for busy weekday cooking - double returns!

Share/Save/Bookmark

Saturday, July 30, 2011

Sasha's Kitchen: Homemade Three Cheese Ravioli with Marinara Sauce


I'll admit it, making your own ravioli is time consuming and tedious. It takes a long time and a bit of upper arm strength, and is a bit tricky at first. But once you get the hang of it, it is totally worth it. not only does your ravioli taste 1000 times better than anything I have ever bought, but it is much less costly than buying gourmet ravioli, and a typical recipe makes enough to freeze for several meals, so it's actually good at saving time in the long run. Here's my second foray at ravioli making which may have been even better than the first. The first time though, I was fortunate enough to use ramps, but now that it's summer, ramps are out of season, so I used scallions instead. The dough recipe is from my pasta class that I took at the Brooklyn Kitchen, but uses less salt. 


Sasha's Three Cheese Ravioli
1 15oz containers of skim milk ricotta cheese
8 oz goat cheese, crumbled1/2 cup grated pecorino cheese
1/2 to 1 tsp red pepper flakes
1 eggbunch of scallions, diced
zest of one lemon4 cups flour
4 large eggs
4 T extra virgin olive oil
1 tsp Kosher salt

about 3 T of water


First, prepare the dough by mixing the four eggs, salt and olive oil in your mixer. Add the flour all at once and mix until it has a sandy texture. Add about 2-4 T of water to bring into a dough in the mixer (and with your hands to help bring it together, as it may not fully come together until you squeeze it together with your hands). Divide into four balls, wrap with plastic wrap and chill for an hour before using. 


Roll out to the dough to the Number 7 setting on your pasta machine and press into the ravioli molds. Mix the cheeses, egg, scallions, red pepper flake and lemon zest and fill for the filling. Dry the ravioli on a drying rack so they dry uniformly and do not become sticky (note - this was a mistake I made the first time). Prepare by placing in boiling water for about five minutes, freezing the extra. This recipe makes about six dozen ravioli.


For the pasta sauce
1 can san marzano tomatoes, squeezed and crushed by hand
1 onion diced
4 cloves of diced garlic
1 tsp oregano
1 tsp thyme
1/2 tsp red pepper flakes
1 T balsamic vinegar


Saute the onions and garlic until lightly browned. Then add to the tomatoes and mix in the spices. Bring to a boil and then simmer. Add more oregano and thyme as needed, and season with some pepper. Just before serving, stir in the balsamic vinegar.


Share/Save/Bookmark

Sunday, June 5, 2011

Sasha's Kitchen: Homemade Ravioli with Ramps in Sage Butter Sauce


Ramps (also know as wild leeks) are one of my favorite vegetables of the spring. They're gone now, sadly, as the season has passed, but before they were, I tried them out in some delicious ravioli. I learned how to make ravioli and pasta at a wonderful pasta making class that I took at the Brooklyn Kitchen in Williamsburg, which is a wonderful place to take cooking classes. After the class, I bought a pasta machine and a ravioli press, very reasonably, both of which are needed to make ravioli. This was the first recipe I tried, which was a winner. The recipe made plenty, so I froze half of the raviolis rather than cooking them all.

Sasha's Homemade Ravioli with Ramps in Sage Butter Sauce 
pasta dough (see below)
2 15oz containers of ricotta cheese
1/2 cup grated pecorino cheese
1/2 to 1 tsp red pepper flakes
bunch of ramps, diced
4 T butter
4 T olive oil
7-8 sage leaves

Pasta Dough (recipe from the Brooklyn Kitchen class i took)
4 cups flour
4 large eggs
4 T extra virgin olive oil
4 tsp Kosher salt

To prepare the dough, beat the eggs, extra virgin olive oil and salt in your mixer until smooth. Then add all of the flour, and beat until it forms a dough. You may need to add some additional water (I added about 3 T) to bring it all together. Take the dough out of the stand mixer once it is coming together, and form int four balls. Wrap in plastic wrap and refrigerate for about 45 minutes.

Meanwhile, make the filling with the two cheeses, red pepper flakes and ramps.

Then roll the first ball of dough in your pasta machine, starting at the widest setting, following the manufacturers instructions.  Flour the machine before using it and roll several times at the first setting to form a nice, even sheet. Then roll two times at each setting, getting progressively thinner. I stopped after setting number 7. Cut the sheets into sheets the length of the ravioli press and press one into the ravioli press, using the top to mold it into form. Fill each with a teaspoon of the filling. Lay a second pasta sheet neatly on top and roll over both as hard as possible with a rolling pin to press the ravioli and cut it into shape. Remove the ravioli carefully from the press and separate. The  dry for about 20-30 minutes on a drying rack before cooking. Continue with the rest of the dough - the recipe makes about four dozen ravioli. It's like magic, isn't it? To cook, place in salted water brought to a boil and cook for about five minutes.

Serve in a butter/sage sauce. I browned the butter in the pan, then added the sage and olive oil and cooked for a few minutes, before mixing in the cooked ravioli. Serve with a bit of grated cheese.


Share/Save/Bookmark

Saturday, May 28, 2011

Sasha's Kitchen: Bucatini with Ramps and Fiddlehead Ferns


I will share my much awaited recipe for beef sauerbraten with sweet and sour cabbage and pretzel dumplings tomorrow - just don't have time to write it up today, as we are headed off to spend the day with family. But, in the meantime, I wanted to share a fantastic spring pasta dish that uses the fabulous, hollow tubular bucatini, and one of my favorite spring vegetables - ramps, or wild leeks. Nothing could be better than that little bit of garden fresh onion green with your bucatini, trust me. My mom also has been talking up fiddlehead ferns, another delicious green vegetable that you can only get this time of year, so I threw those in as well. The first time I tried making them, I seasoned them badly and they looked like fried insects, but not this time - everything was sautéed in butter and olive oil, with some panko breadcrumbs for a delicious, garden fresh, spring dinner!


Sasha's Spring Garden Pasta with Ramps and Fiddlehead Ferns
1 12oz package of bucatini
1 large bunch of ramps, finely chopped, bulbs removed
4 oz fiddlehead ferns
3 T butter
3 T extra virgin olive oil
1/2 tsp red pepper flakes
1 cup panko breadcrumbs

First, sauté the ramps and fiddlehead ferns in the butter in a large saute pan. Saute the fiddlehead ferns first, for about 3-4 minutes, then add the ramps and saute another five minutes, until the ramps are well cooked and wilted and the fiddlehead ferns are soft. When adding the ramps, add a half teaspoon (less or more to taste) of red pepper flakes.


In the meantime, prepare the bucatini in a pot of salted boiling water. Toast the breadcrumbs on a frying/saute pan for a few minutes until lightly browned.  When the pasta is cooked, add it to the pan with the butter/ramps/fiddlehead ferns. Add a tablespoon or two of the leftover pasta water (a trick I learned from watching the Food Network), and two to three tablespoons of olive oil, and sauté the pasta for a minute or so, until everything is evenly mixed. Mix in the toasted panko and serve.
Share/Save/Bookmark

Tuesday, May 3, 2011

Sasha's Kitchen: Bucatini All'Amatriciana


Lupa is one of my favorite restaurants in New York. Babbo's twin sister, it has a more relaxed atmosphere and more reasonable prices, but its still classic Mario Batali.  My favorite thing to get when I go to Lupa (though they have the same dish at Babbo) is Mario's classic pasta dish bucatini all'amatriciana. I was able to score some bucatini, or hollow tubular pasta at Eataly a couple weeks ago, in preparation to make this dish using Mario's original recipe.  You really do need to use actual bucatini pasta to make this dish properly. Yes, you can use spaghetti, but it really takes away from the dish having the proper texture and feel, and maybe even taste. This time I did everything to the letter and I was thrilled with the results of this textbook bucatini all'amatriciana. Yes, I usually do not eat pig-derived products as a rule, but this is the one dish I make an exception for!

Mario Batali's Bucatini All'Amatriciana (adapted from this recipe)
3/4 pound guanciale
3 garlic cloves
1 red onion, halved and sliced 1/2 inch thick
1 1/2 tsp hot red pepper flakes (I used closer to only 1 tsp)
kosher salt and freshly ground black pepper to taste
2 cups basic tomato sauce (see below; note I used more than Mario because I like a saucy pasta)
1 lb bucatini
1 bunch fresh leaf parsley
pecorino romano or parmesan for grating

Mario's basic tomato sauce
1/4 cup extra virgin olive oil
1 spanish onion, chopped in a quarter inch dice
4 cloves of garlic, peeled and chopped
3 T chopped fresh thyme
1/2 medium carrot, finely shredded
2 cans peeled whole tomatoes, crushed by hand, juices reserved
salt to taste


Heat the olive oil in a large saucepan. Add the garlic and onion and cook until golden brown. Add the thyme and carrot and cook five minutes more until the carrot has softened, before adding the tomato and juices. Bring to a boil, then simmer for about 30 minutes. Season with salt and serve. This makes 4 cups and technically you are only supposed to use two cups, but I used all of it and the dish was saucy and amazing.

Next, bring a large pot of about six quarts of water to boil with two teaspoons salt.  In a saute pan, cook the guanciale slices over medium heat until most of the fat has been rendered from the meat, rotating occasionally.  Remove the meat, and use the remaining fat to cook the onions, garlic and red pepper flakes. According to Mario you are supposed to discard some of the fat if you have too much but I didn't so I kept it all. Return the guanciale to the pan and cook for another five minutes until the onions look golden brown in color. Season with salt and pepper and add in the tomato sauce.

Cook the bucatini in the boiling water until al dente. Drain the pasta and add to the simmering sauce, while adding the parsley at the end. Then, turn to high heat, and toss to coat. Serve immediately with grated cheese.


Share/Save/Bookmark

Sunday, March 6, 2011

Sasha's Kitchen: Southern Pimento Mac & Cheese


Mac & cheese is that perfect comfort food when the rest of life seems just too complicated and too much of a mess, at times. I have my own signature mac & cheese that I love, but could not resist a recipe that I came across in Bon Appetit for some southern style pimento mac & cheese.  Pimento cheese is a southern style cheese made with cheddar and pimento-type peppers, basically blended into a paste. More or less, that is the basis behind the flavor of this mac & cheese recipe. I adapted the proportions a bit from the original recipe to get things to my liking, but this is adapted from the recipe in this month's Bon Appetit.  I used some lower fat cheeses and a bit larger proportion of pasta so my version is perhaps just a tad bit healthier. Still tastes amazing! I had pimento for the first time  few months ago when I was in Atlanta, and this dish is really true to taste.

Southern Pimento Mac & Cheese
1 red bell pepper, seeded and cut into 1 inch pieces
2 cloves garlic, diced
1/2 cup panko breadcrumbs
3 T butter
2/3 cup parmesan cheese
3/4 cup drained peppadew peppers in brine, 1 T brine reserved
1/4 tsp ancho chili powder
pinch of cayenne pepper
1 1/2 cups light cheddar cheese, grated
1 1/4 cups whole milk mozzarella
1 box (16 oz) mini-shell pasta


Bring 1/2 of a cup of water, 1 1/2 cloves of garlic and the bell pepper to boil. Then lower heat and simmer, covered, for 15 minutes. Toss the panko in a skillet and brown lightly over medium heat (about 5 minutes). Transfer to a bowl and combine with 1 T of butter, and 1/4 cup of parmesan, and set aside.

Put the bell pepper/ water mixture in a blender. Add the peppadew peppers and one tablespoon of the brine, and also the rest of the garlic, ancho chili powder, grated cheddar and remaining parmesan.  Blend until smooth, and season with salt and pepper.

Preheat the oven to 400 and butter an 8 cup baking dish. I used one of my lovely Emile Henry ones.  Cook the pasta until al dente. Stir the pimento sauce in, and add the shredded mozzarella, stirring to combine. Spoon into baking dish and top with the breadcrumb mixture. Bake about 25 minutes until the topping is crisp.

In the mood for more Southern Food? I made some Mardi Gras cupcakes today . . .


Share/Save/Bookmark

Saturday, January 29, 2011

Sasha's Kitchen: Savory Lasagna Cupcakes


Cupcakes are so wonderful and cute and trendy these days, that I figured it was time to make some sort of savory cupcake. Now, while I am sure, you could make a cupcake that was cake-based, but still savory, I cam across a recipe for lasagna cupcakes made in ramekins which sounded like such a fun idea.  The recipe, which can be found here, was for white lasagna cupcakes. I liked the idea, but the cheeses and what not in the recipe didn't really d the trick for me, so I went ahead with the inspiration and created by own recipe for lasagna cupcakes. In addition, I made mine in silicon cupcake molds, which meant that they were a bit more of a true cupcake then if I had made them in ramekins., although perhaps a bit smaller. They were still delicious and made for a great Monday night dinner this week. This recipe should make about 8 or 9.


Sasha's Savory Lasagna Cupcakes
Pam to spray the silicon cupcake molds
4 T butter
1/2 cups grated Parmesan cheese
1 box of lasagna noodles, cooked
1/2 cup of flour
3 plum tomatoes, cut into slices
2 cups of skim milk
1 large egg
2 T parsley
6oz of gruyere cheese (grated)
salt and pepper to taste
slice of freshly made mozzarella to top each cupcake
silicon cupcake tray

Spray the silicon cupcake tray with Pam or a similar spray.  Preheat the oven to 350. Boil and cook the lasagna in salted water (make sure to add salt so they don't stick together) until al dente, and drain and cool with cool running water. Using a rounded glass, cut circles out of each of the lasagna noodles. Place one of these circles in each of the cupcake molds, and set the others aside for now.

Melt the butter in a large saucepan, and add the flour, mixing until clumpy. Add the skim milk and whisk over medium heat for about fine minutes, until thickened. Turn the heat off, and whisk in the egg and parsley.  Add the grated gruyere and a half a cup of the parmesan, and stir to combine.

On top of each pasta circle in the silicon cupcake mold, add some of the filling and a slice of the plum tomato. The add another pasta round, and top with more filling and another slice of tomato to fill. Add another pasta round at the top (of you have enough) and top with a tomato and a slice of mozzarella. Sprinkle some parmesan on top, which should require another half cup.  You can fit more in if you use ramekins, but I found the cupcake molds to be just fine.

Cover with foil and bake at 350 for 20 minutes. Remove the foil and bake for another 20 minutes. The cheeses on top (parmesan and mozzarella) should be crispy and browned, just like lasagna. Using a spoon or spatula, press each of the "cupcakes" out of the molds to serve. We found that this recipe served two.


Share/Save/Bookmark

Friday, January 7, 2011

Sasha's Kitchen: Sweet Pea Pesto


Pesto time - one of my favorite pasta dishes, and each time I make a pesto, I like to try something a little bit different. A few months ago, last time I made a pesto dish, I was visiting my parents in Rochester and we made a spicy pesto with caramelized U12 scallops, which was delicious. Yesterday, I received my most recent shipment of food from ShopRite as part of the Potluck Blog Panel. Each of the shipments have a theme, and the theme this month was the 40th anniversary of the ShopRite Can-Can Sale which was a winter sale on canned food that started in the 1970s after the holidays where customers would stock up on canned food for the winter.

This is the perfect time of year for some quality canned products in the dead of winter in the northeast (hello, I think blizzard number two is coming this weekend) since fresh fruits and vegetables are scarce this time of year. I was planning on making a simple fettuccine pesto for dinner, but decided to jazz it up with the delicious can of sweet peas that I found in the box. I had never head peas in my pesto before, but it was a perfect combination and a wholesome and delicious dish. I made my pesto from scratch. I like to experiment with different pestos, including a hazelnut pesto, but this time I did a traditional basil pesto. If you wish, you could add caramelized scallops to this dish, but I kept it vegetarian this time, and mixed in some goat cheese, which adds a light and creamy texture to the pesto and is much healthier than heavy cream.

Sasha's Sweet Pea Pesto
Bunch of fresh basil, stems removed
1/2 cup olive oil
1/4 cup pine nuts
4 oz fresh vermont goat cheese, crumbled
fresh pasta (I bought fresh fettuccine rather than the boxed kind for this recipe)
salt and pepper to taste
1 can of ShopRite little gem sweet peas

First prepare the pesto in a food processor by pureeing the olive oil with the basil and pine nuts until smooth. Set aside and cook the pasta and warm up the sweet peas in a pot. Mix in the sweet peas and goat cheese with the pasta, and mix the pesto to coat. That's it - this is a nice and easy dish which is perfect for wintertime and is simple, easy and heathy, too!
Share/Save/Bookmark

Sunday, December 26, 2010

Sasha's Kitchen: Spagetti & Meatballs (Variation No. 1)


I love making spaghetti & meatballs. Each time, I like trying out different twists with my tomato sauce, with different results, most of which are pretty delicious.  The sauce I made the other night was definitely a winner thanks to the incorporation of Italian San Marzano tomatoes - the very best kind of canned tomatoes to use in any pasta sauce. I received a can of ShopRite's San Marzano tomatoes and they worked beautifully in my sauce. I hadn't tried making tomato sauce with San Marzano's before, but they are certainly the best - and you definitely want to use genuine imported Italian ones like these. The meatballs are also delicious. I usually don't put artichoke hearts in my sauce, but I did this time since I had received a can of delicious ones from ShopRite as a member of the Potluck Blog Panel.  Eataly in Manhattan is also a great place to buy different imported varieties of San Marzano tomatoes and other Italian foods. I am sure I will share different variations of my pasta sauces in future posts as well. In this sauce, I incorporated carrots, which I love in my homemade marinara sauces - they sweeten up the sauce just a tiny bit and add some delicious texture and flavor.

Sasha's Meatballs
1 lb lean ground beef
one small onion, diced
1/3 cup panko bread crumbs
2 eggs
garlic powder, salt and pepper to taste


Sasha's Marinara Sauce
1 large 24 oz can San Marzano tomatoes
1 14 oz can tomato puree
1 small can of tomato paste
2 cans of water, using the can from the tomato paste to measure
1 T butter or canola oil
1 onion diced
3 cloves of garlic, diced
two handfuls of carrots, diced
4 sprigs of thyme
1 tsp oregano
salt and pepper to taste

To make the meatballs, combine the ingredients above with the meat and form medium sized balls. I hate touching cold raw meat, but these are so good, so I make them anyhow.

For the sauce, saute the onion and garlic in a saute pan with a bit of canola oil for about five minutes over medium heat. Combine with the other ingredients and bring to a boil. Then simmer for about a half an hour until the sauce reaches the desired consistency. In the meantime, bake the meatballs until they are cooked through - about 30 minutes at 350 degrees. Then add to the pot of sauce and allow to simmer for about 20 minutes so that they can absorb the sauce. Serve with a bit of grated parmesan cheese.
Share/Save/Bookmark
Related Posts with Thumbnails Share